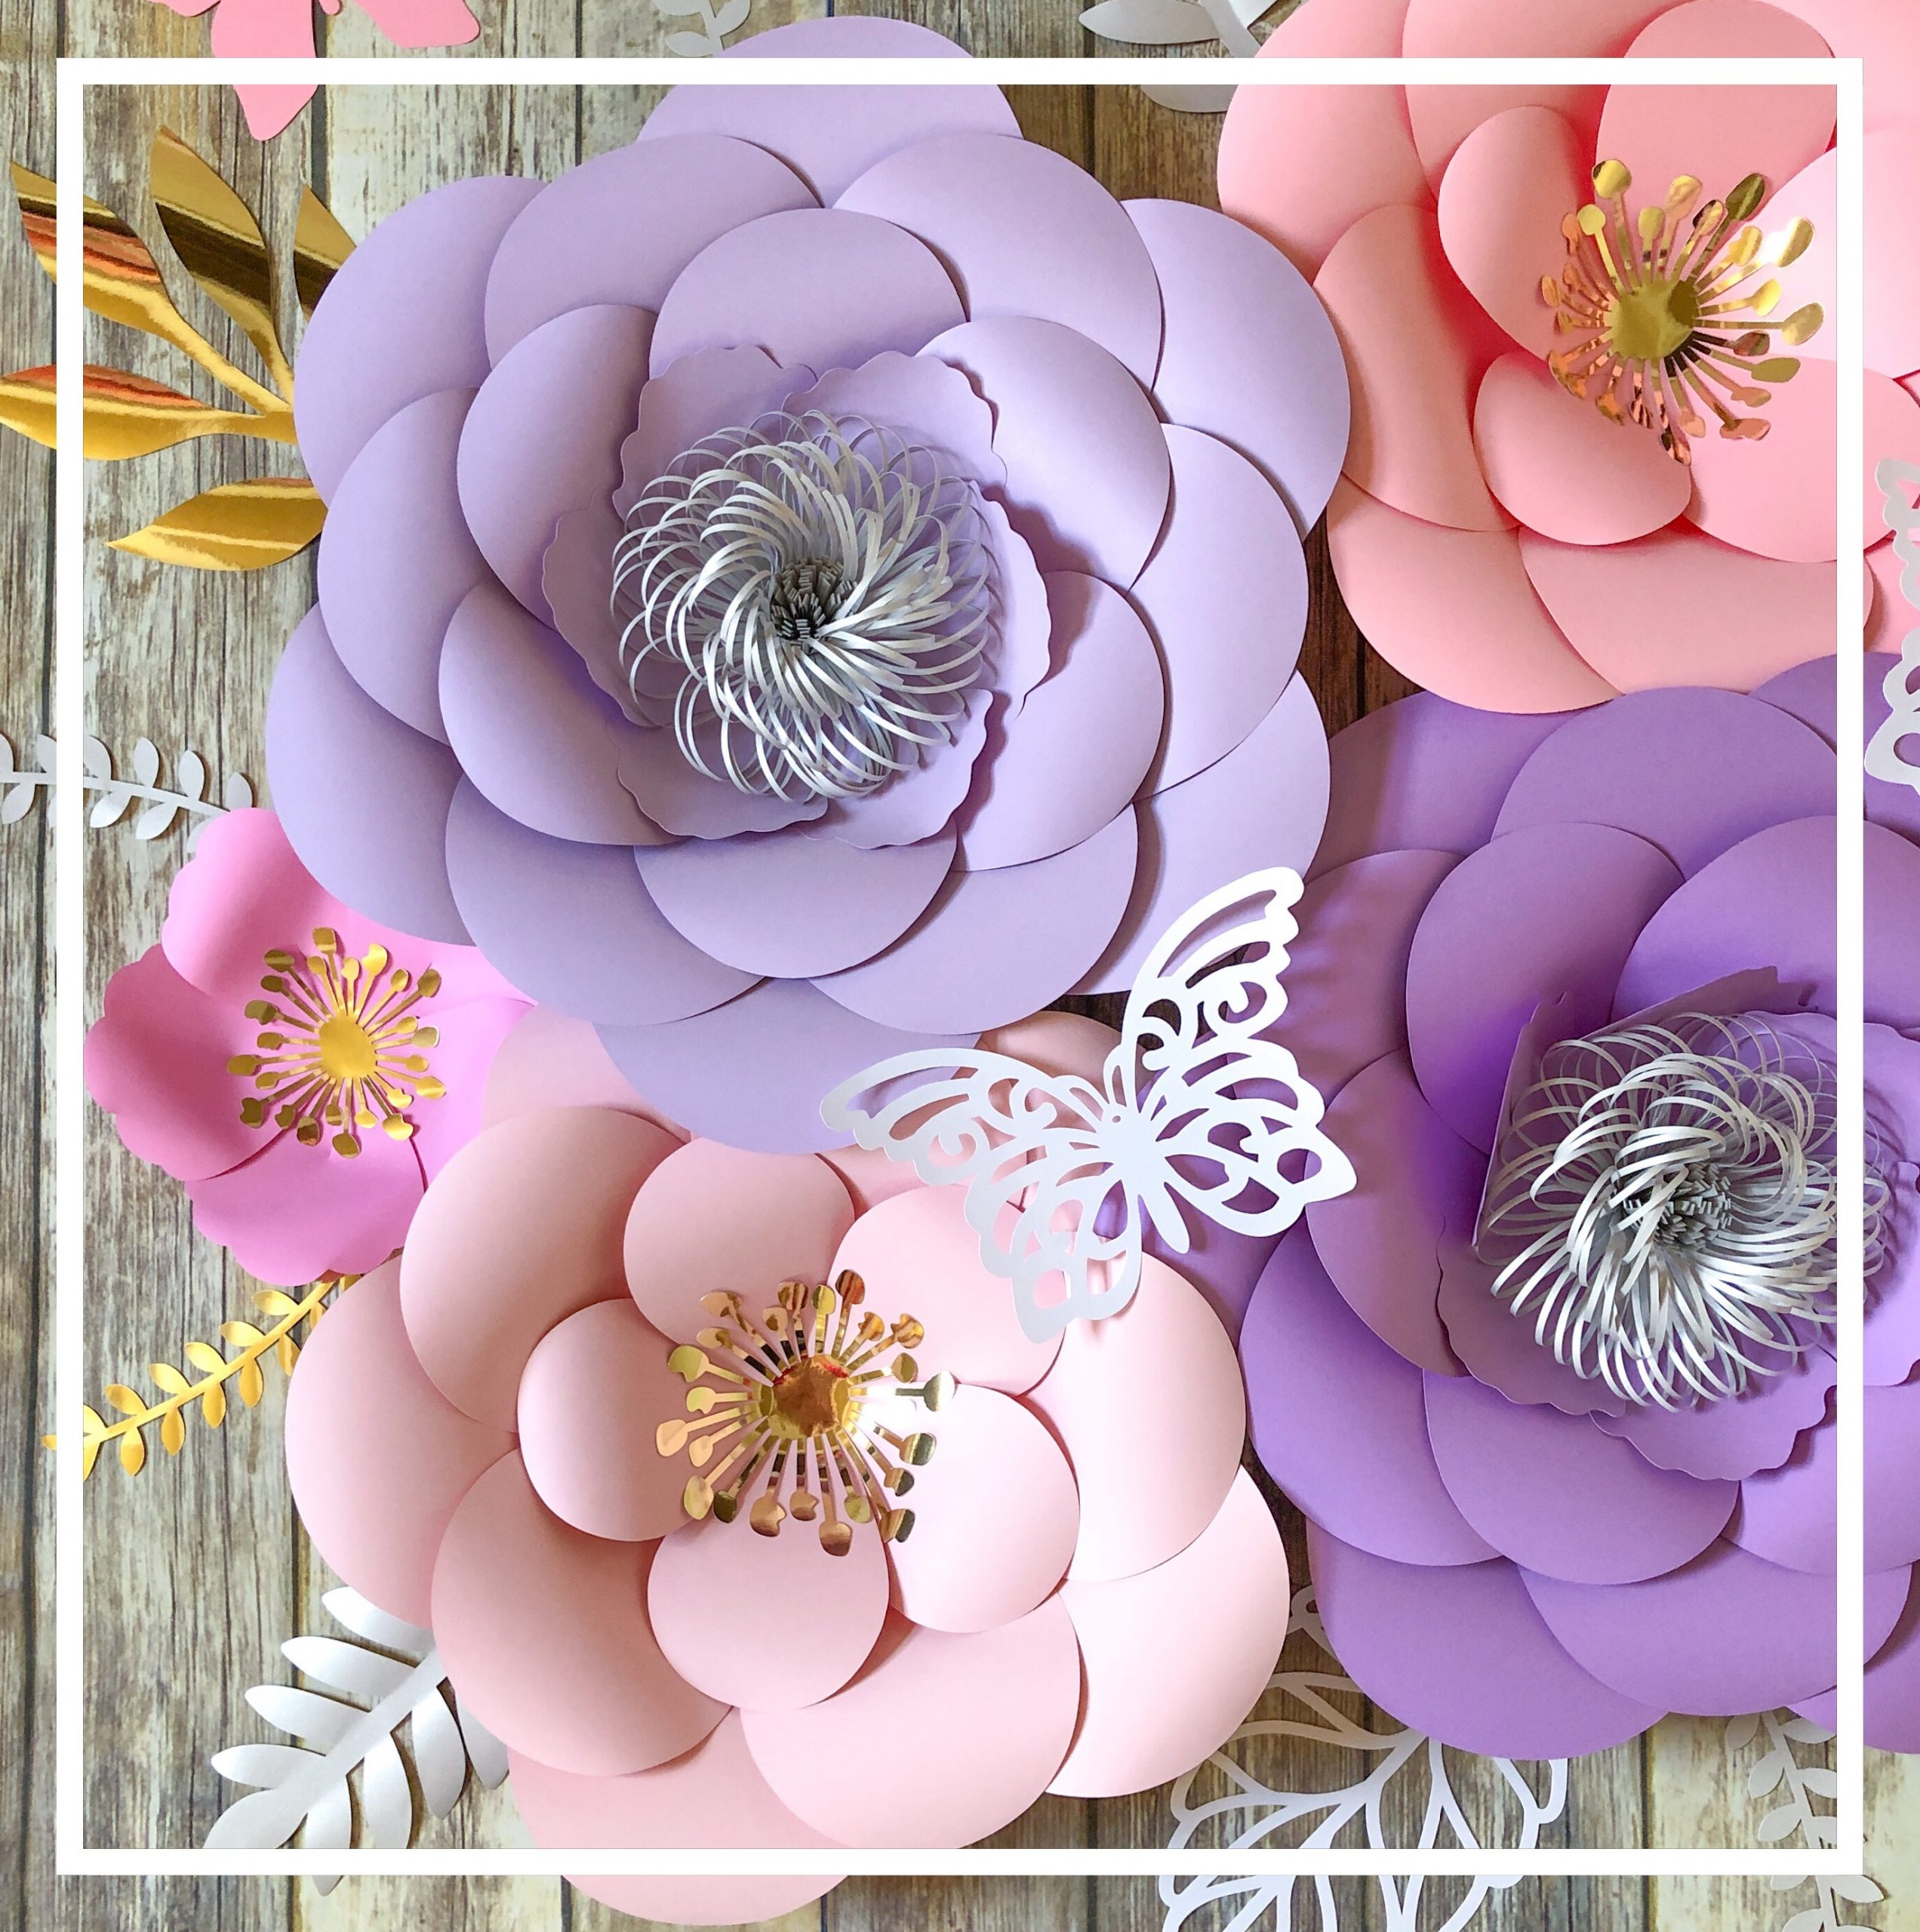
Petal Templates now available in my 🌸 ETSY SHOP 🌸
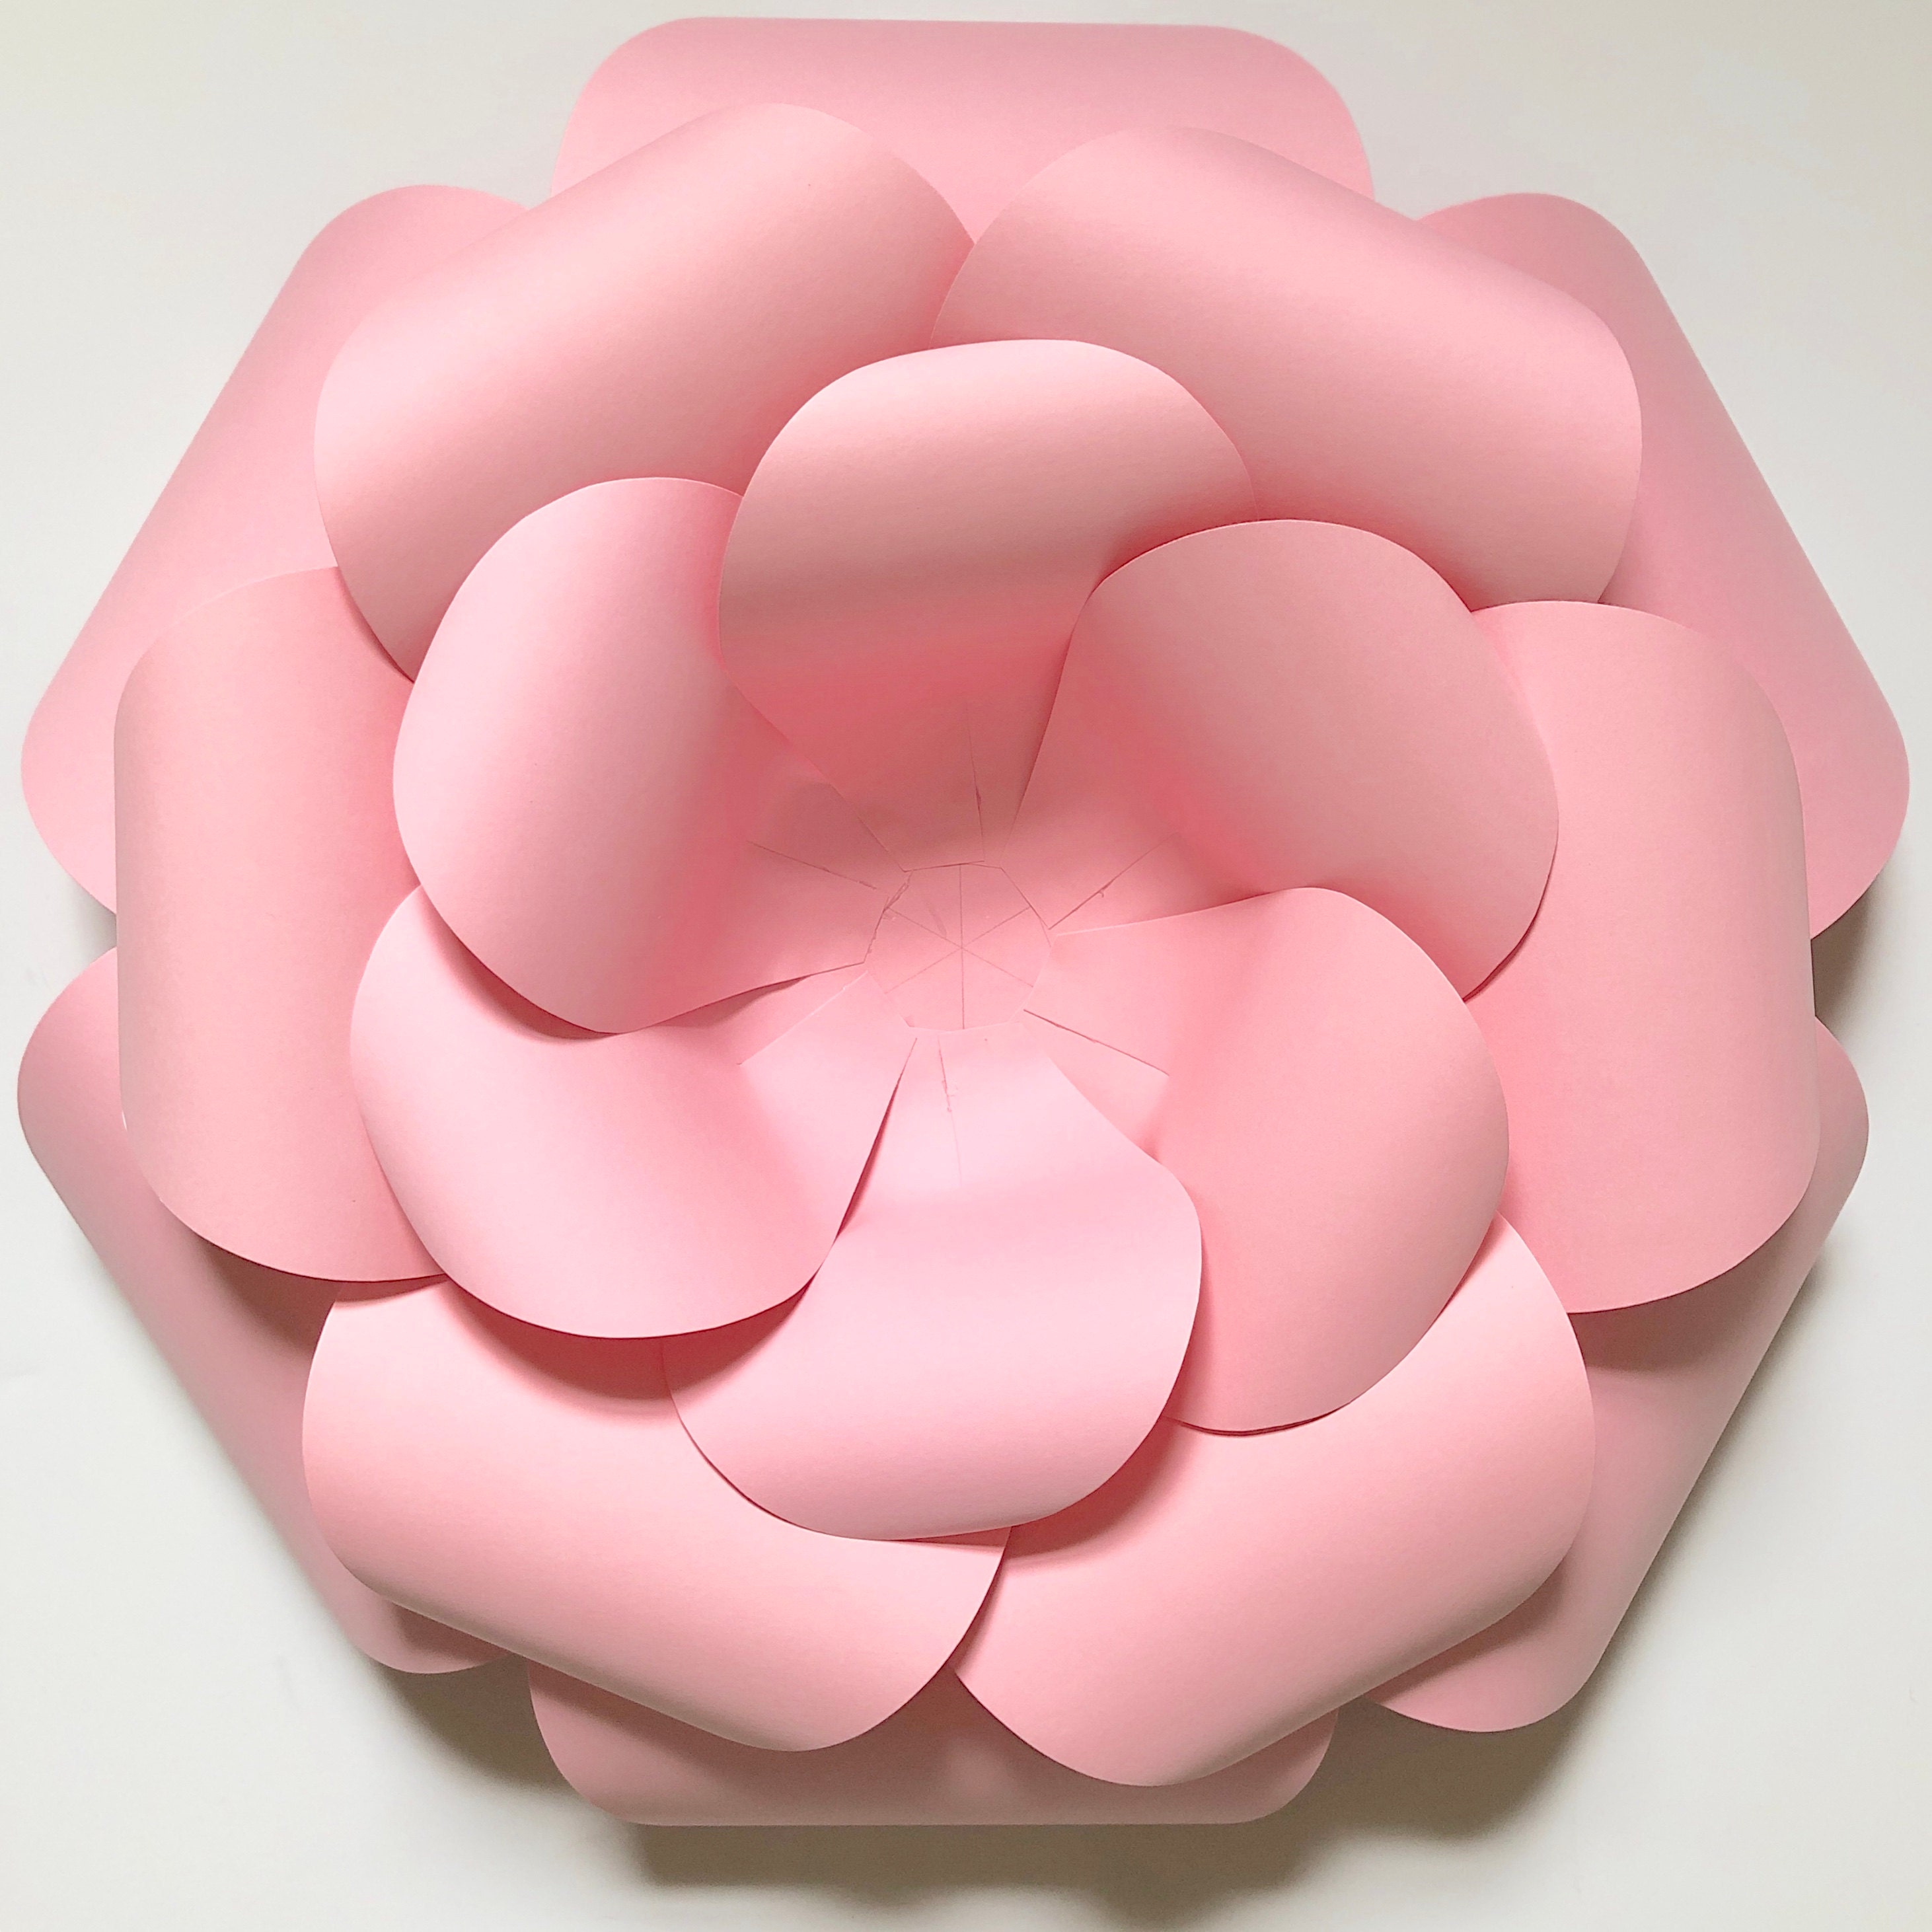
Paper Flower Guide with Pictures
Paper flowers are undeniably amazing decor for both our homes and all kind of events and celebrations. It’s something that we can keep for way way longer than any fresh cut flowers there are.
In this quick paper flower guide I will show you how to create a paper flower step-by-step, with some of my own tips and tricks.
MATERIALS
- Thick paper – 67lb cover (or 175gsm) cardstock is one of the best choices, but going a little bit lower or higher won’t hurt. Try not to go over 110lb cover as the paper gets so thick it will crease easily.
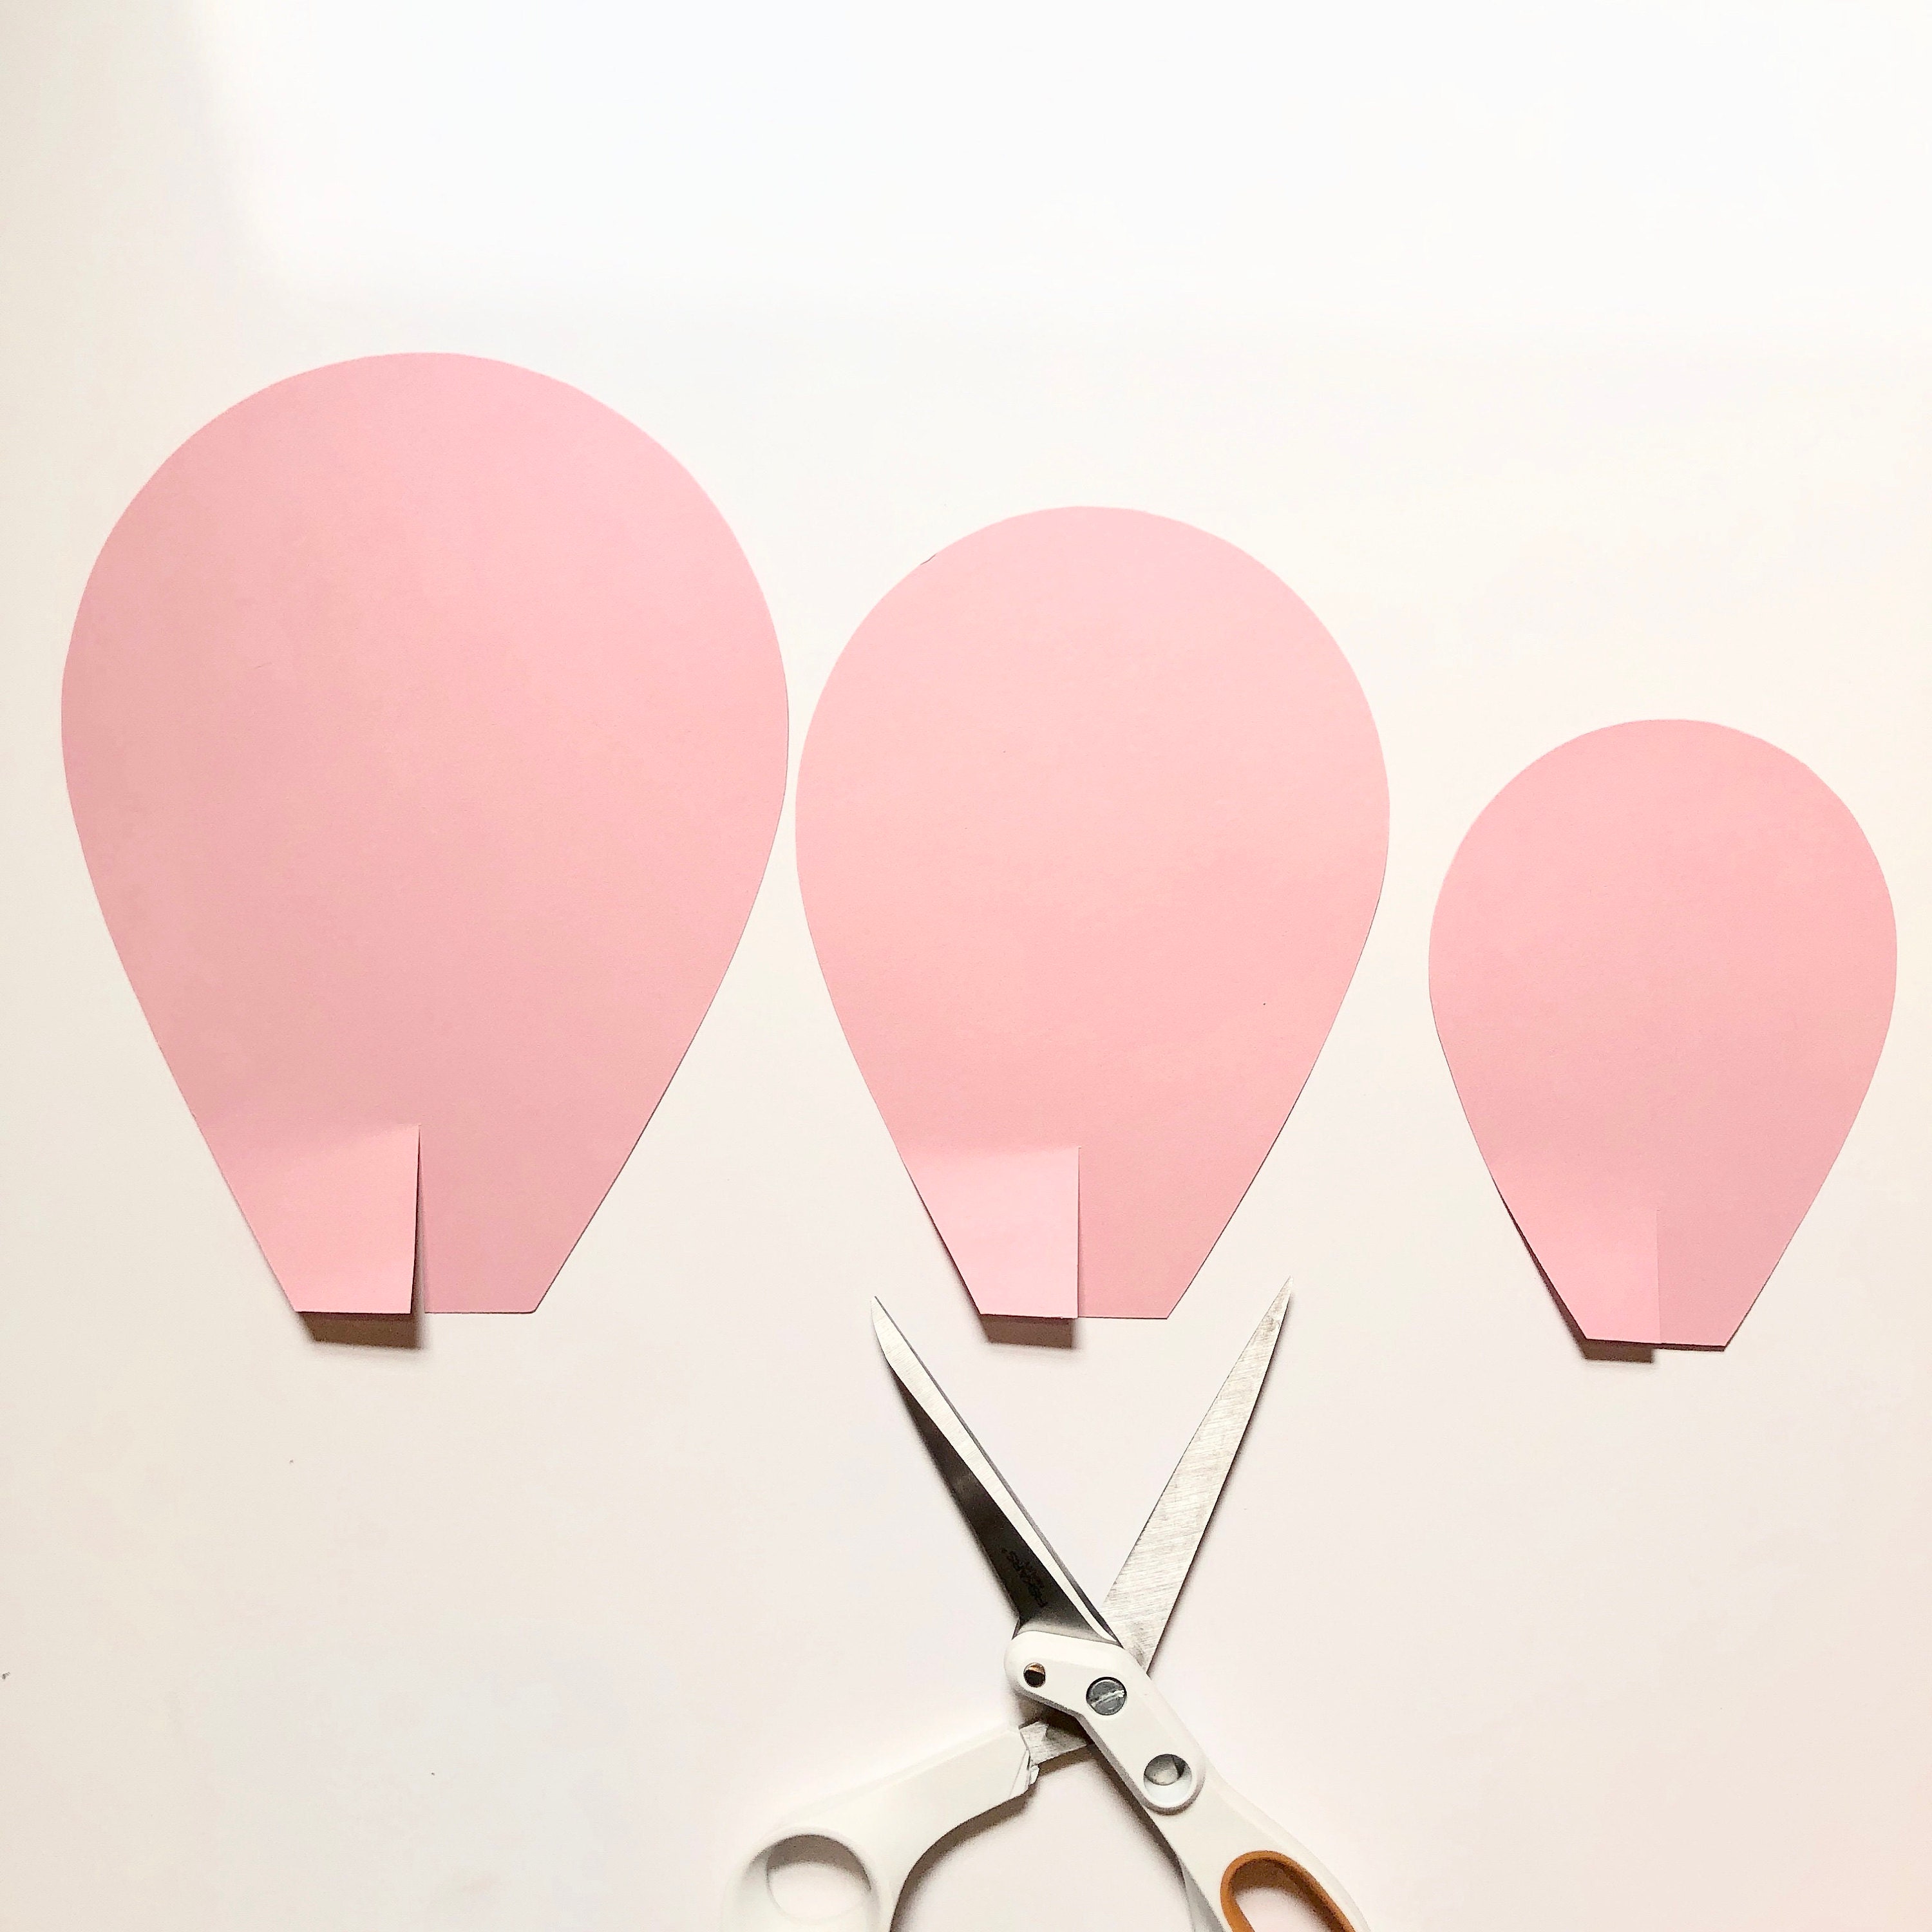
- Sharp scissors – and I really mean it! When cutting through several sheets of cardstock, you will have hard time with an old dull instrument.
- Adhesive – ideally, hot glue is my go-to choice but any fast drying paper glue will do.
- Bone folder to give the petals a smooth shape. As an alternative, you can use dull size of your scissors, thick marker or large hot glue stick.
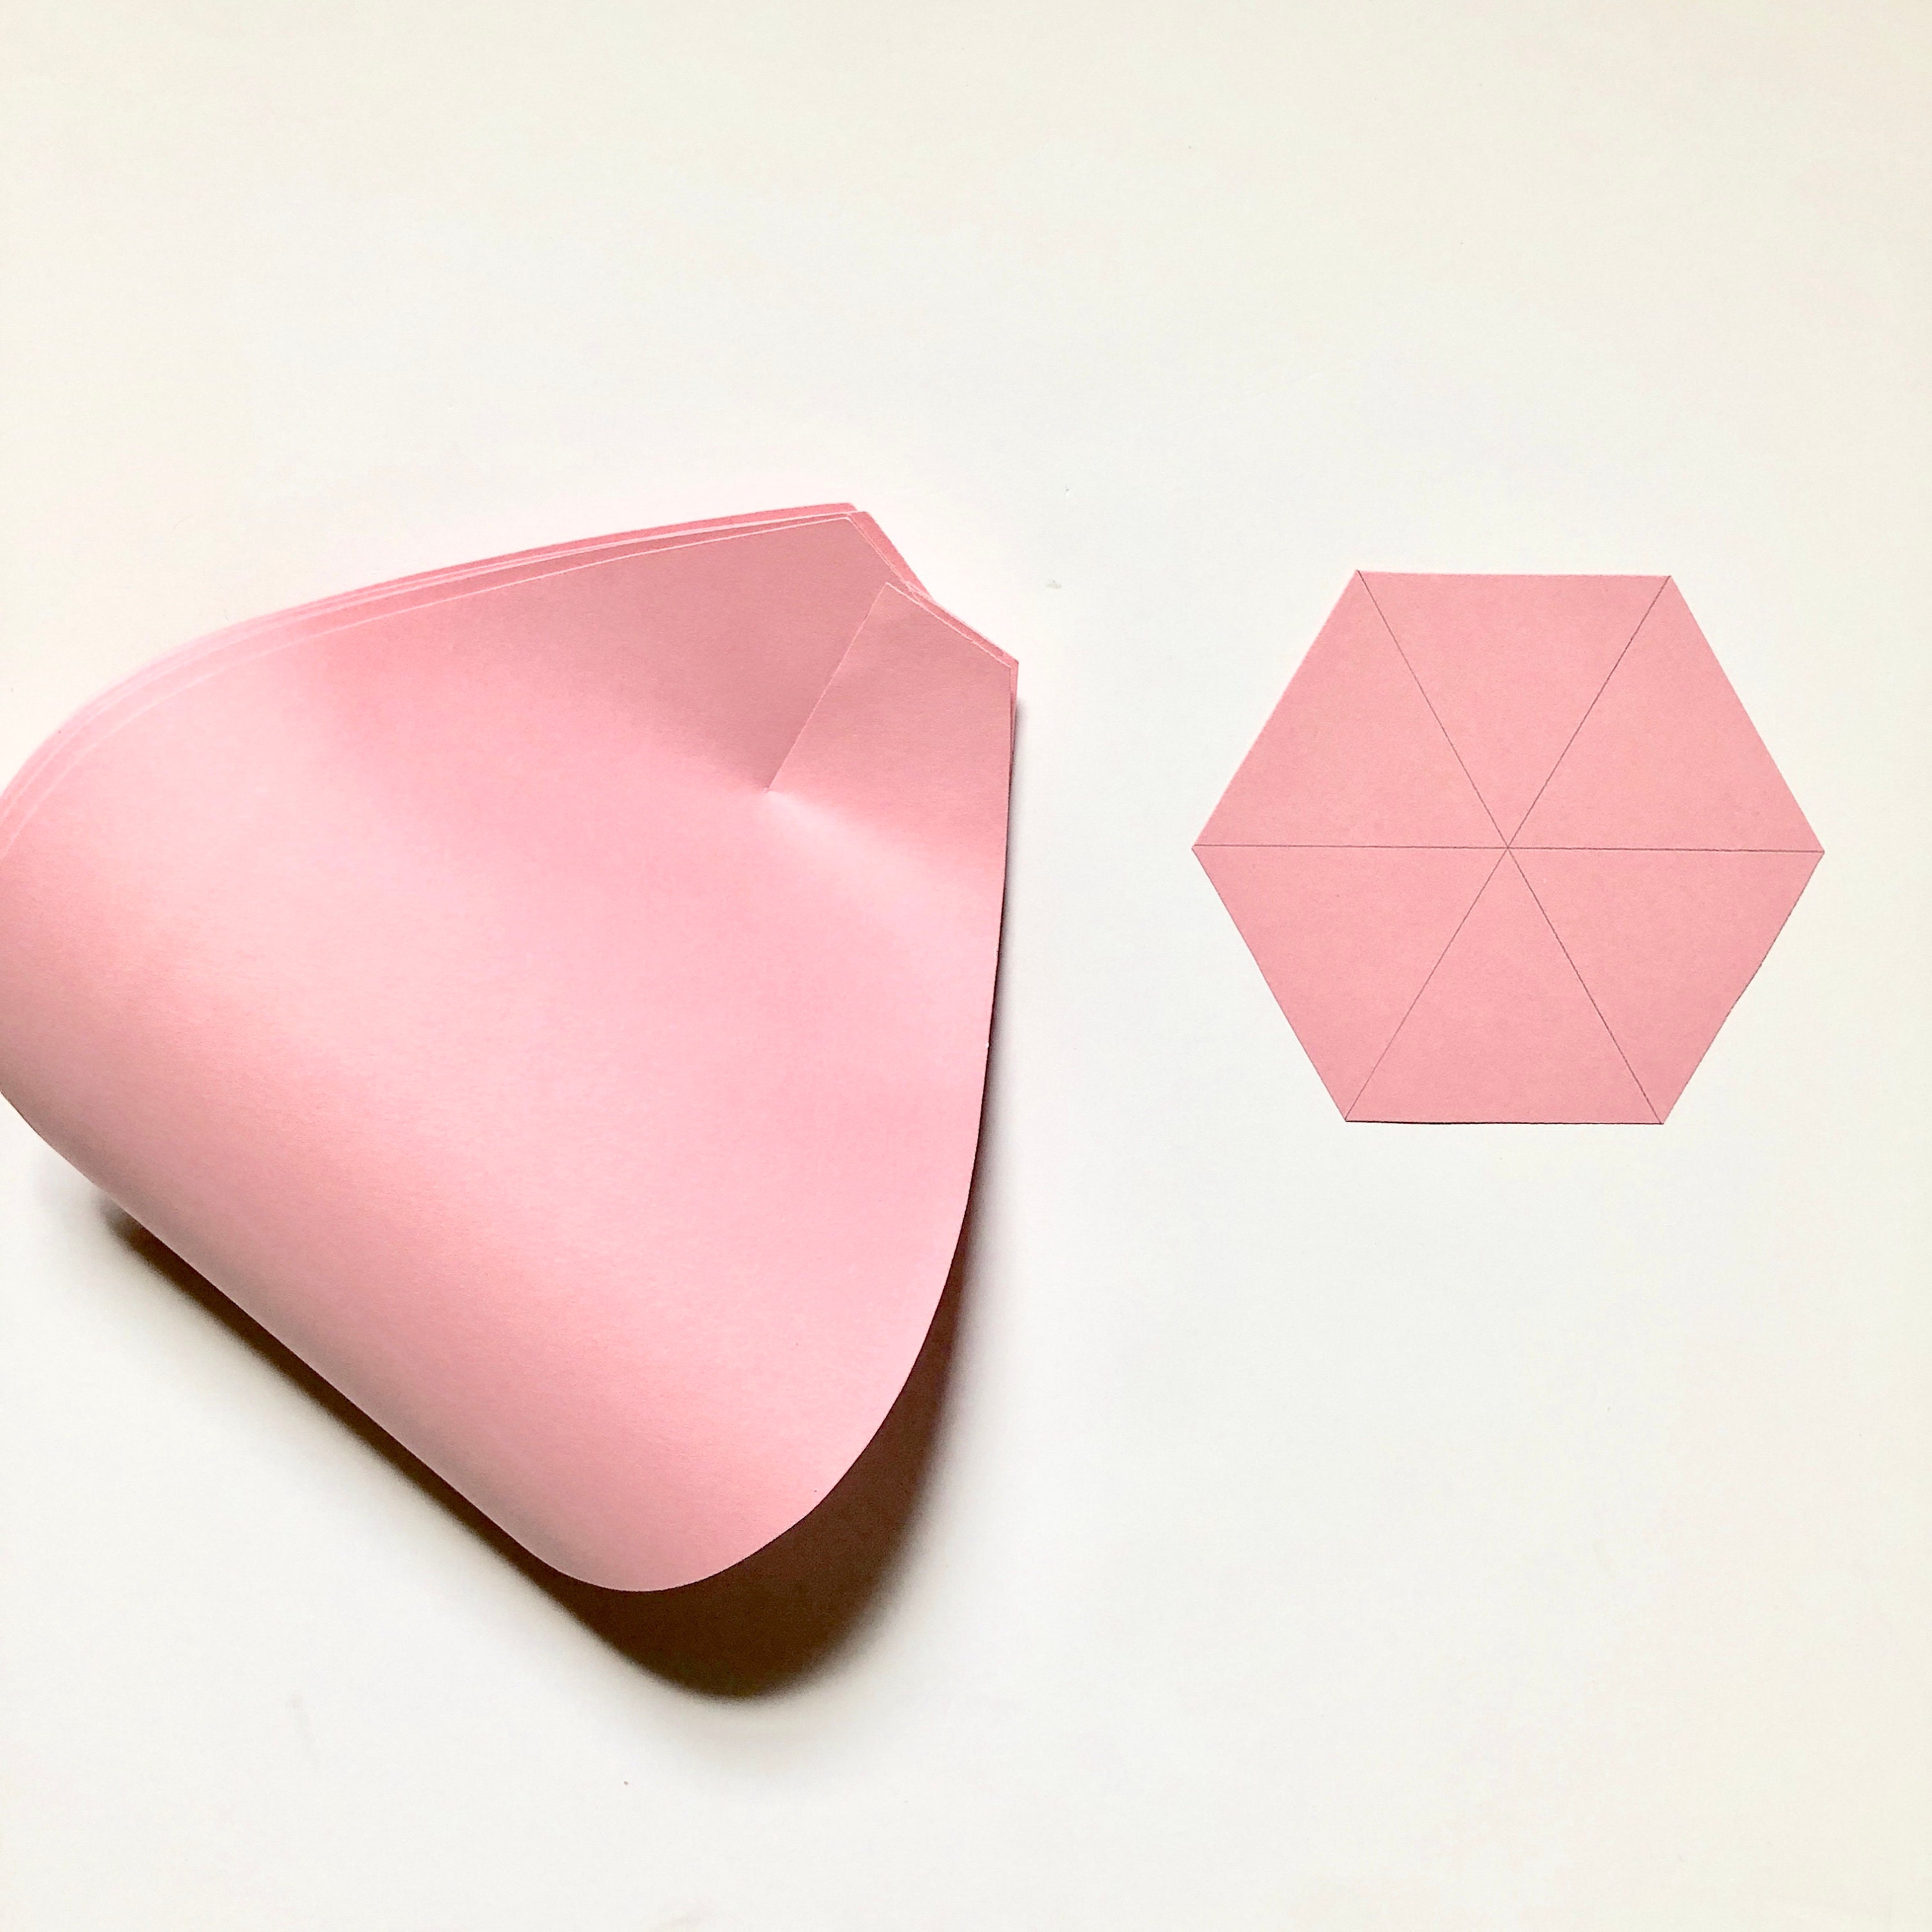
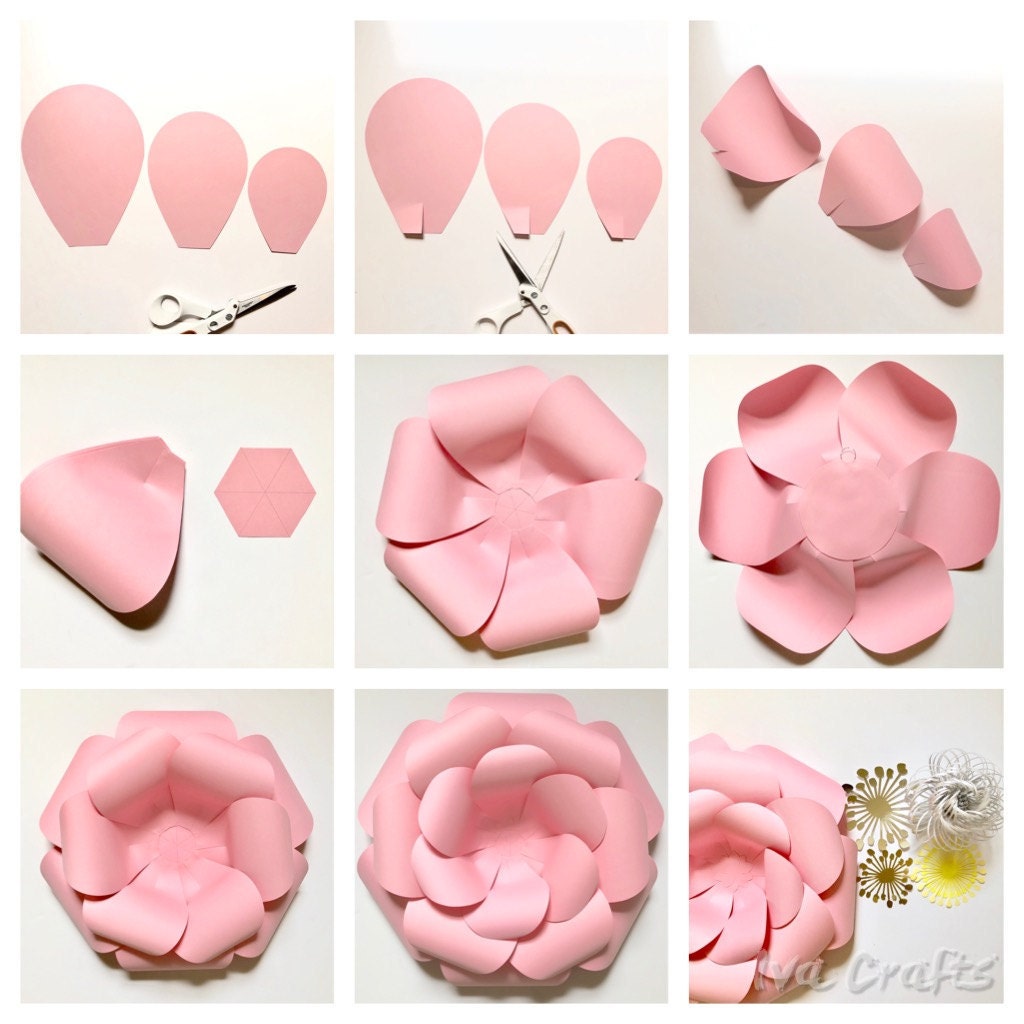
Make approximately 1 ½ inch cut at every petal’s base.
Curl/Shape the petal with bone folder or any other tool of your choice. You can find a quick curling tutorial here.
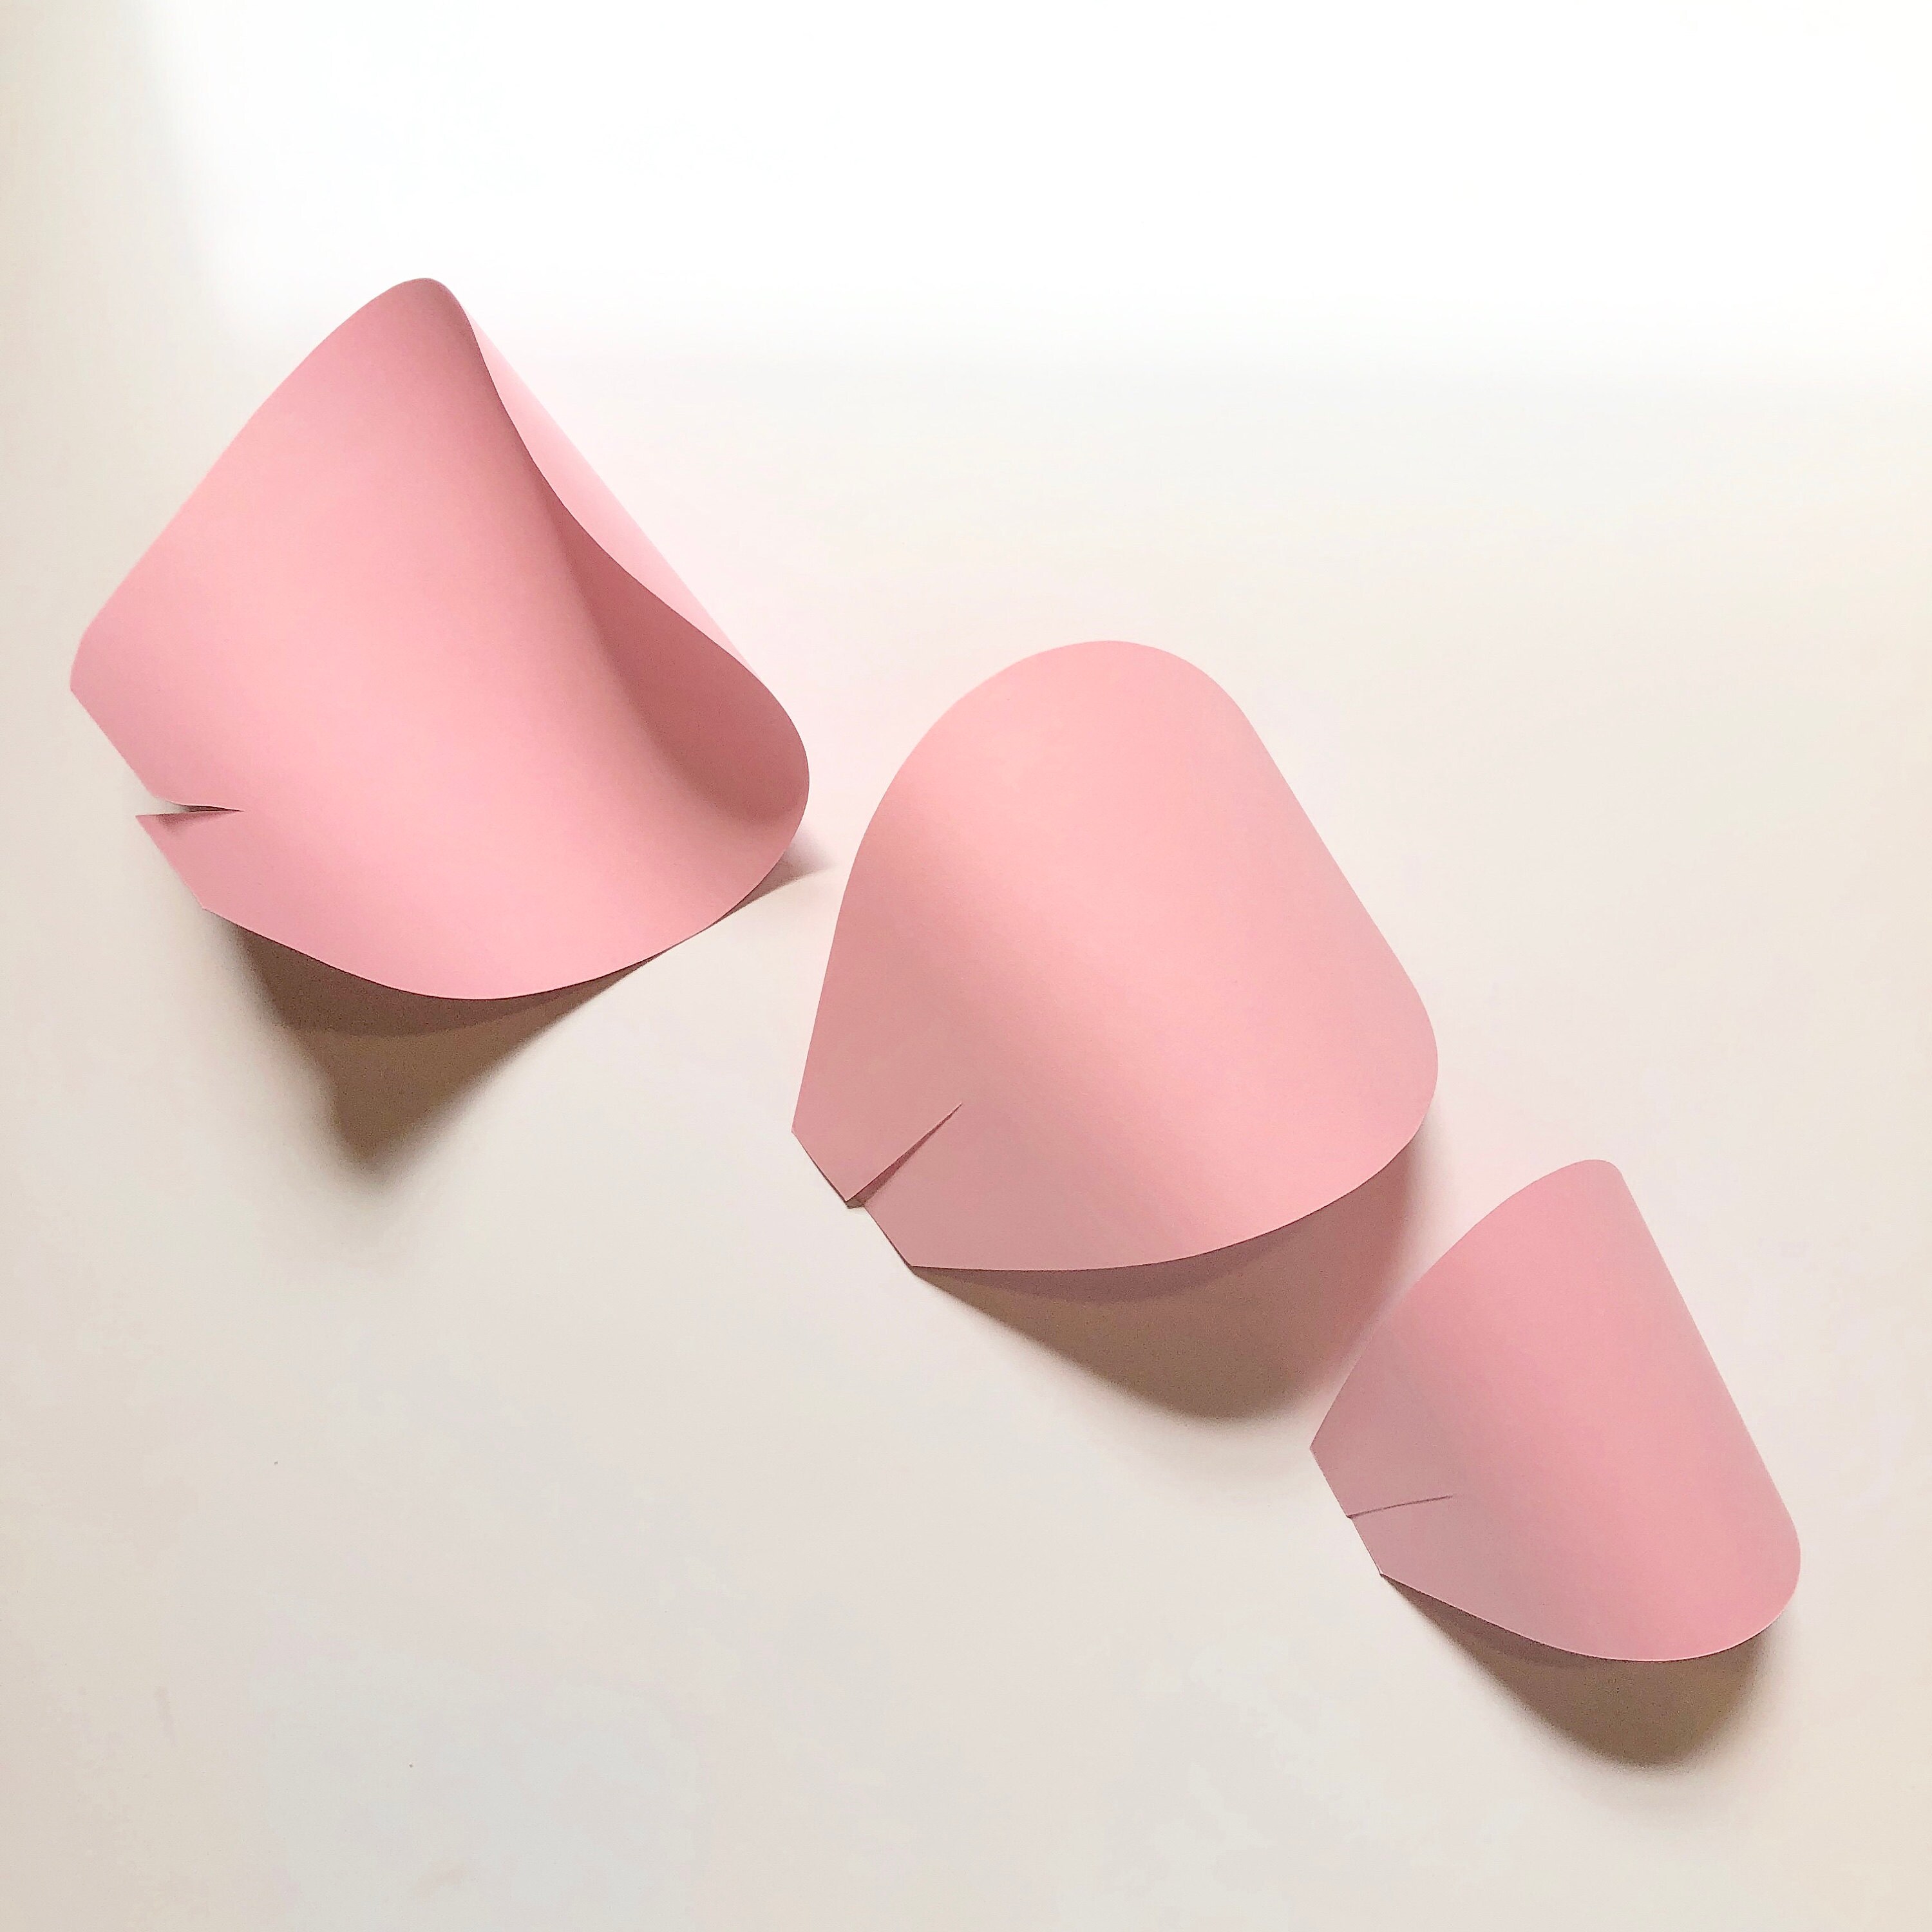
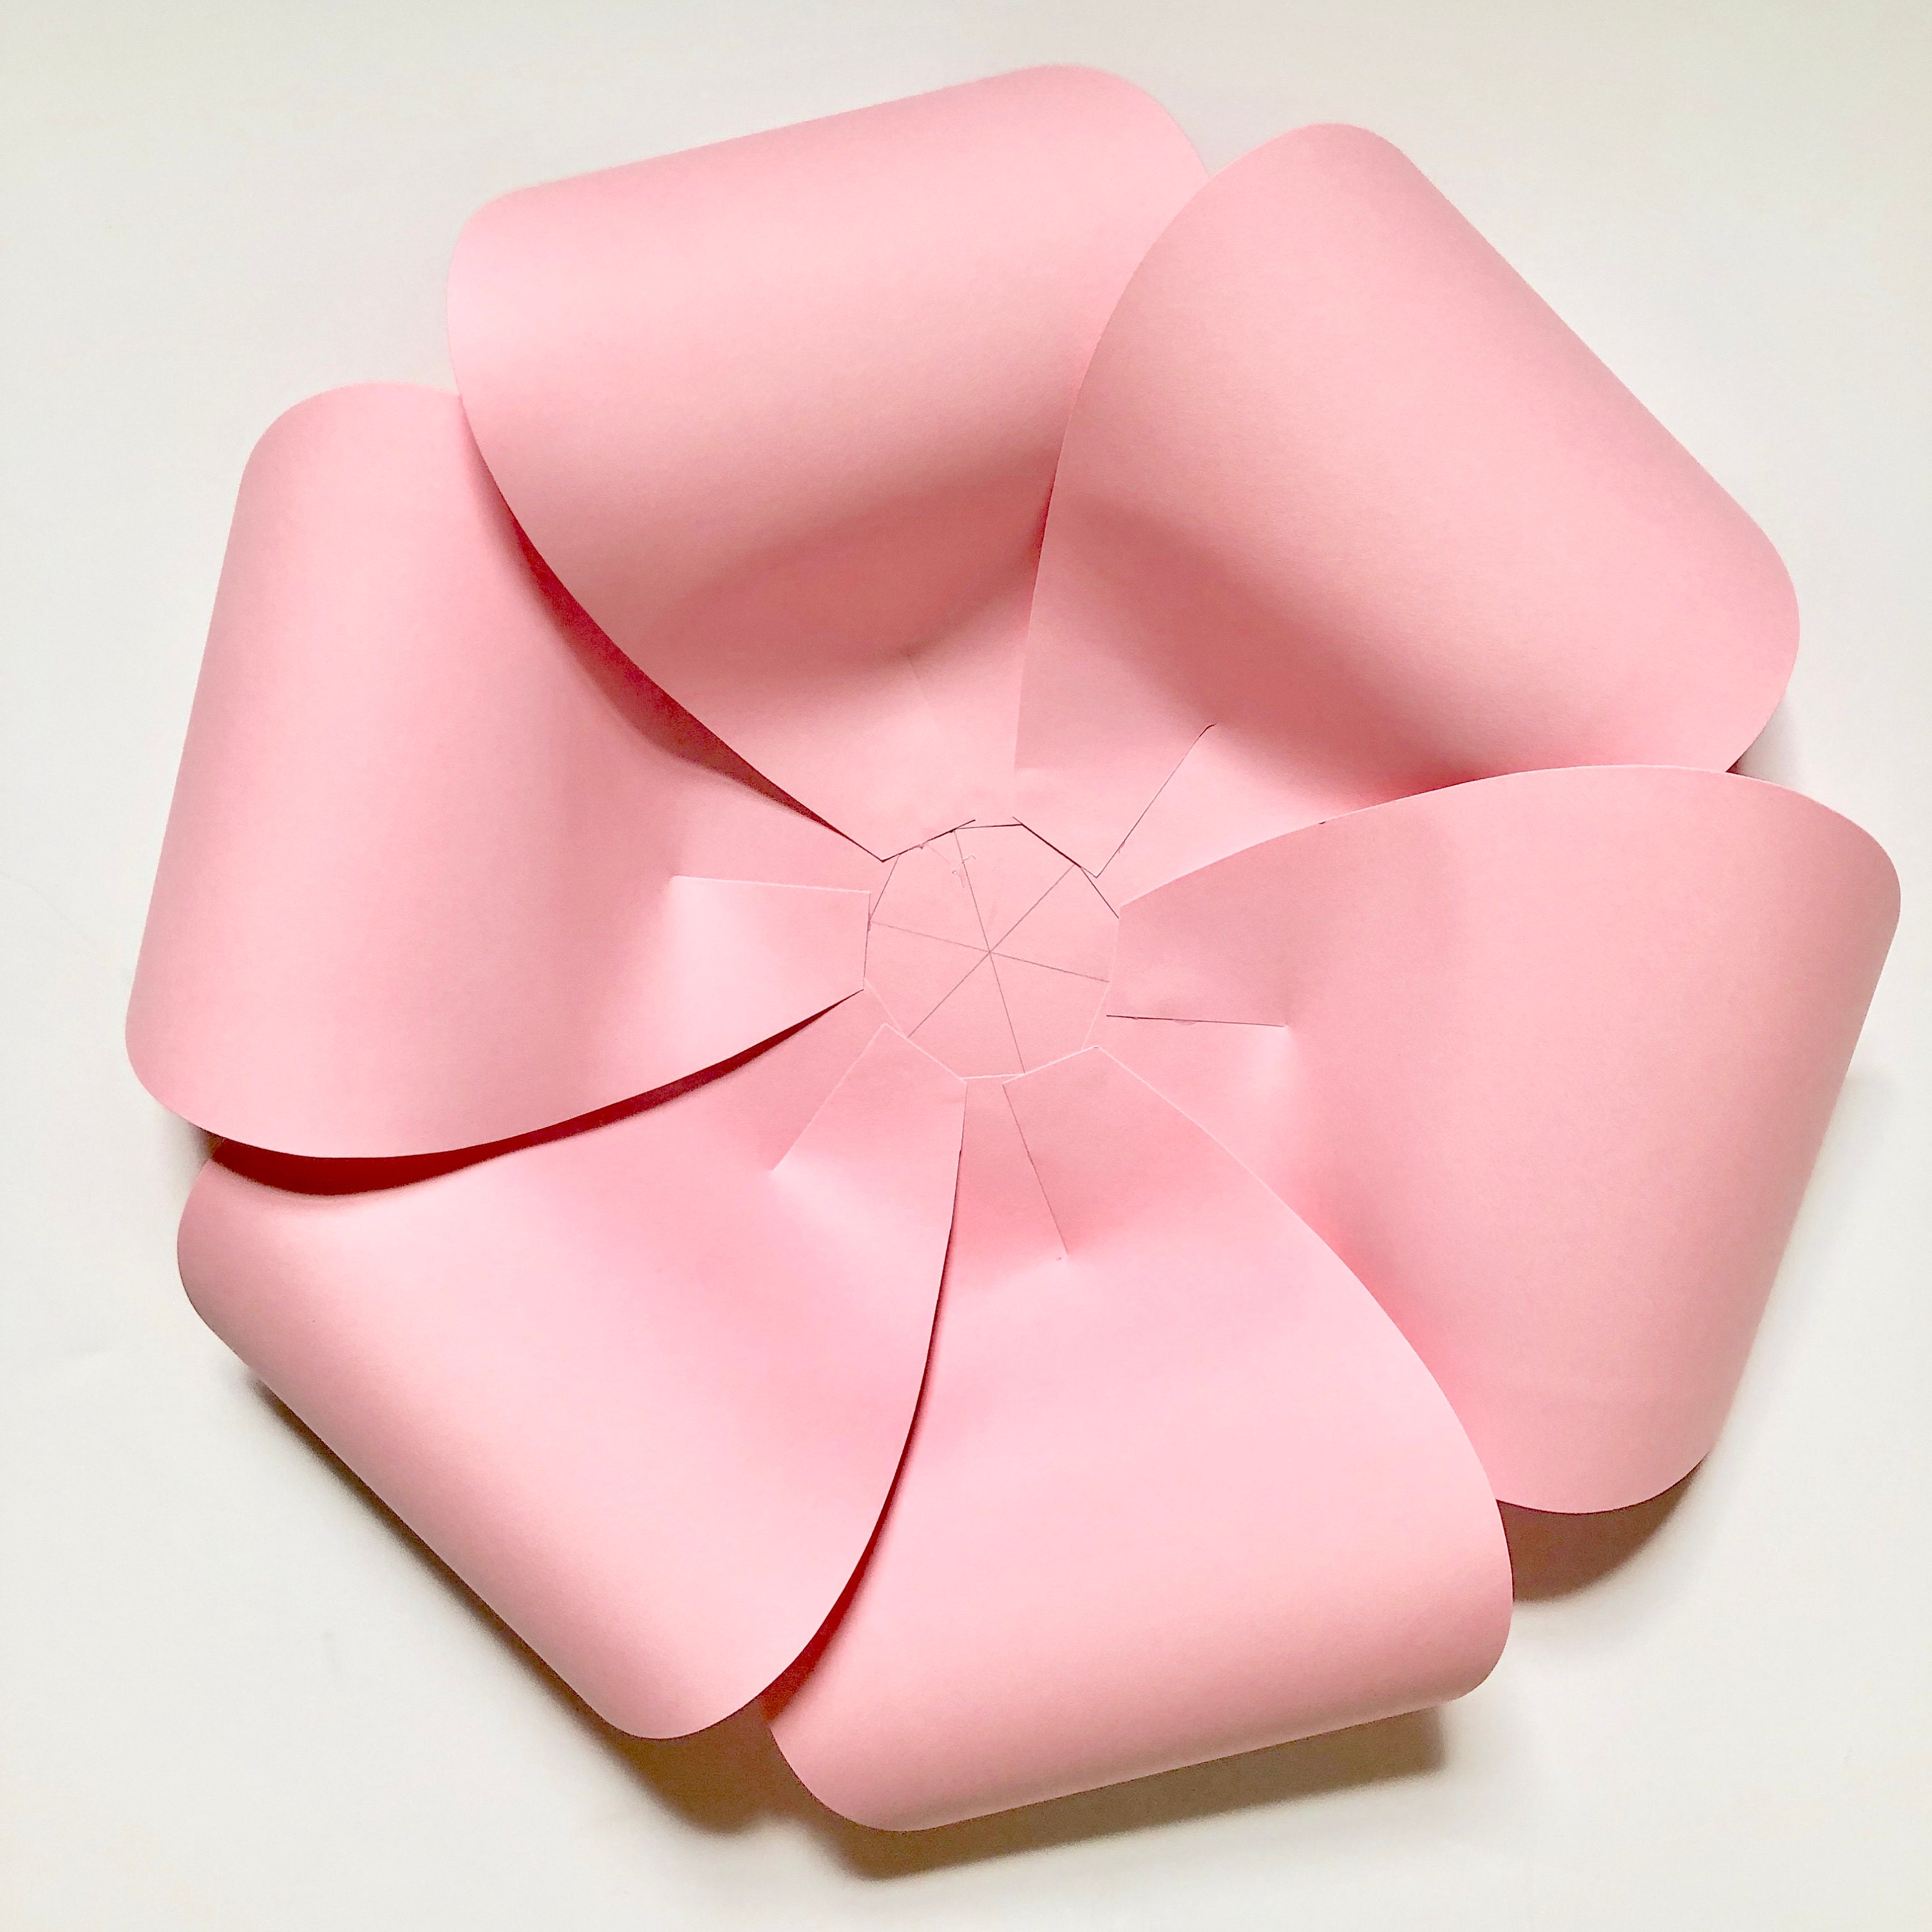
Glue the tips together at an angle. Using a hexagon will help you spread the petals more evenly. You can even draw three guide lines for more precise application.
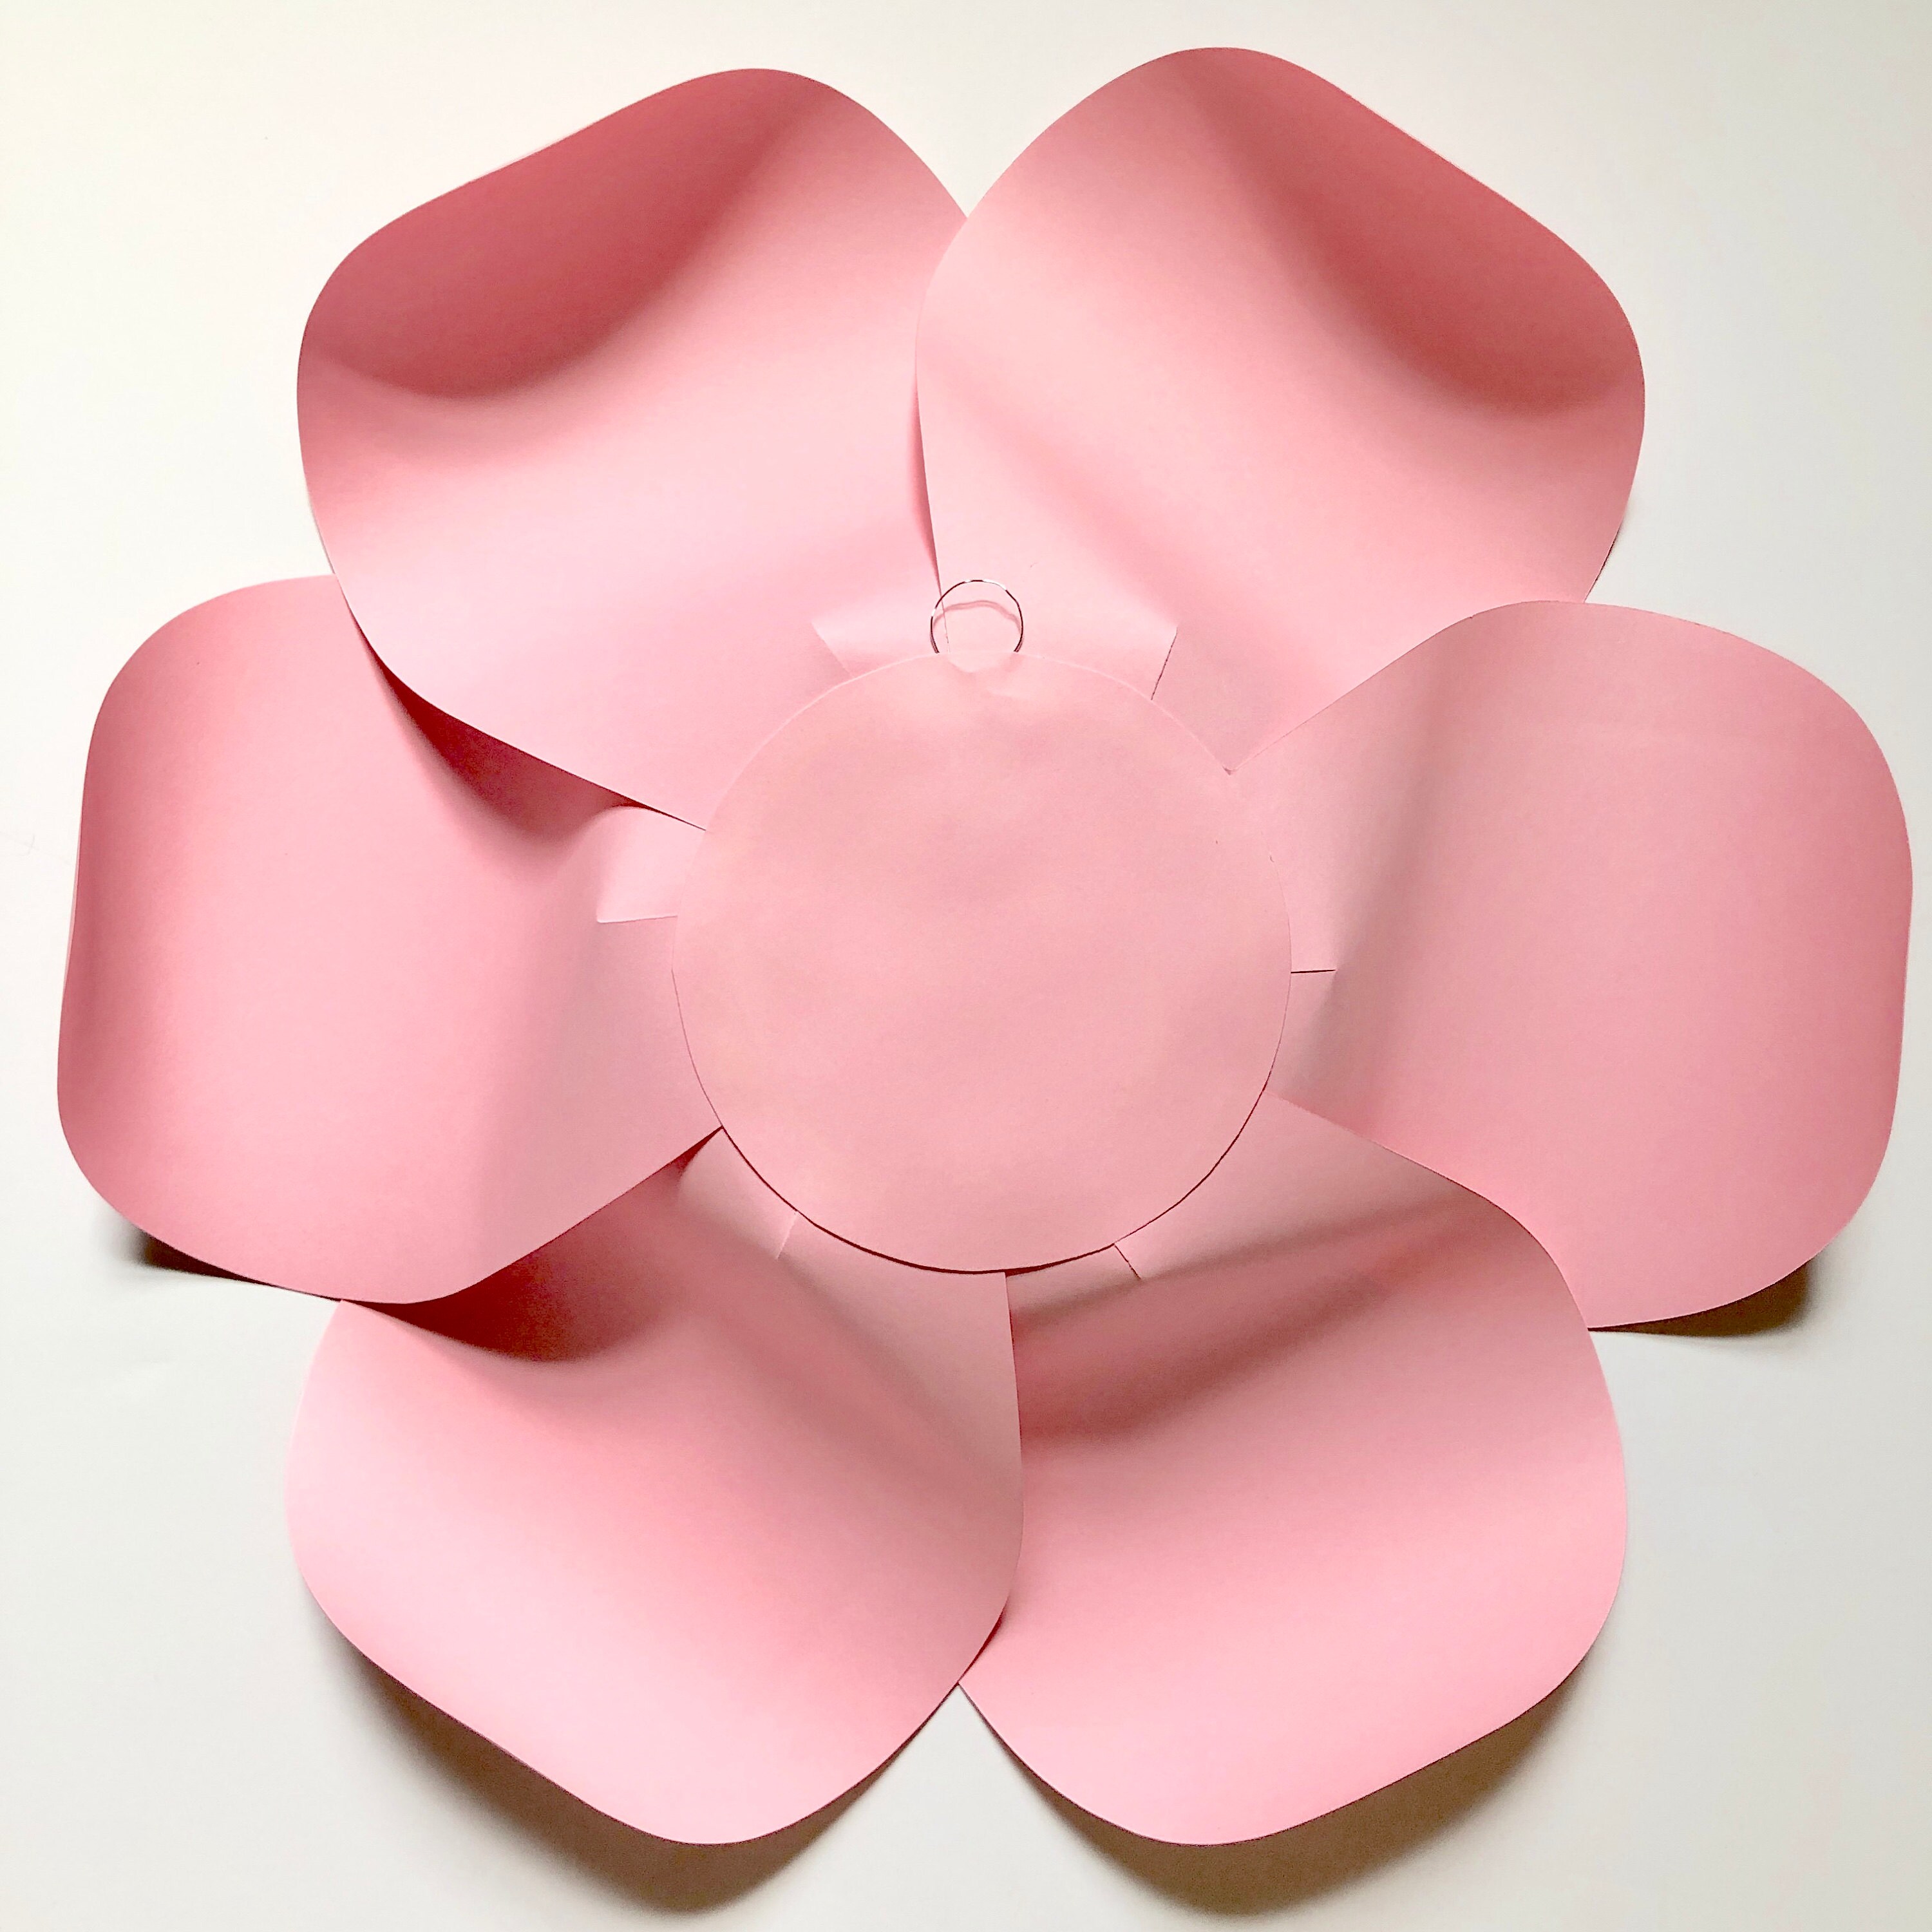
Glue down first layer of petals in a circle.
When the first layer is complete, it’s a good time to add a wire loop on the back if you plan to hang the flower rather than stick it with mounting tape.
Repeat adding next two petal layers.
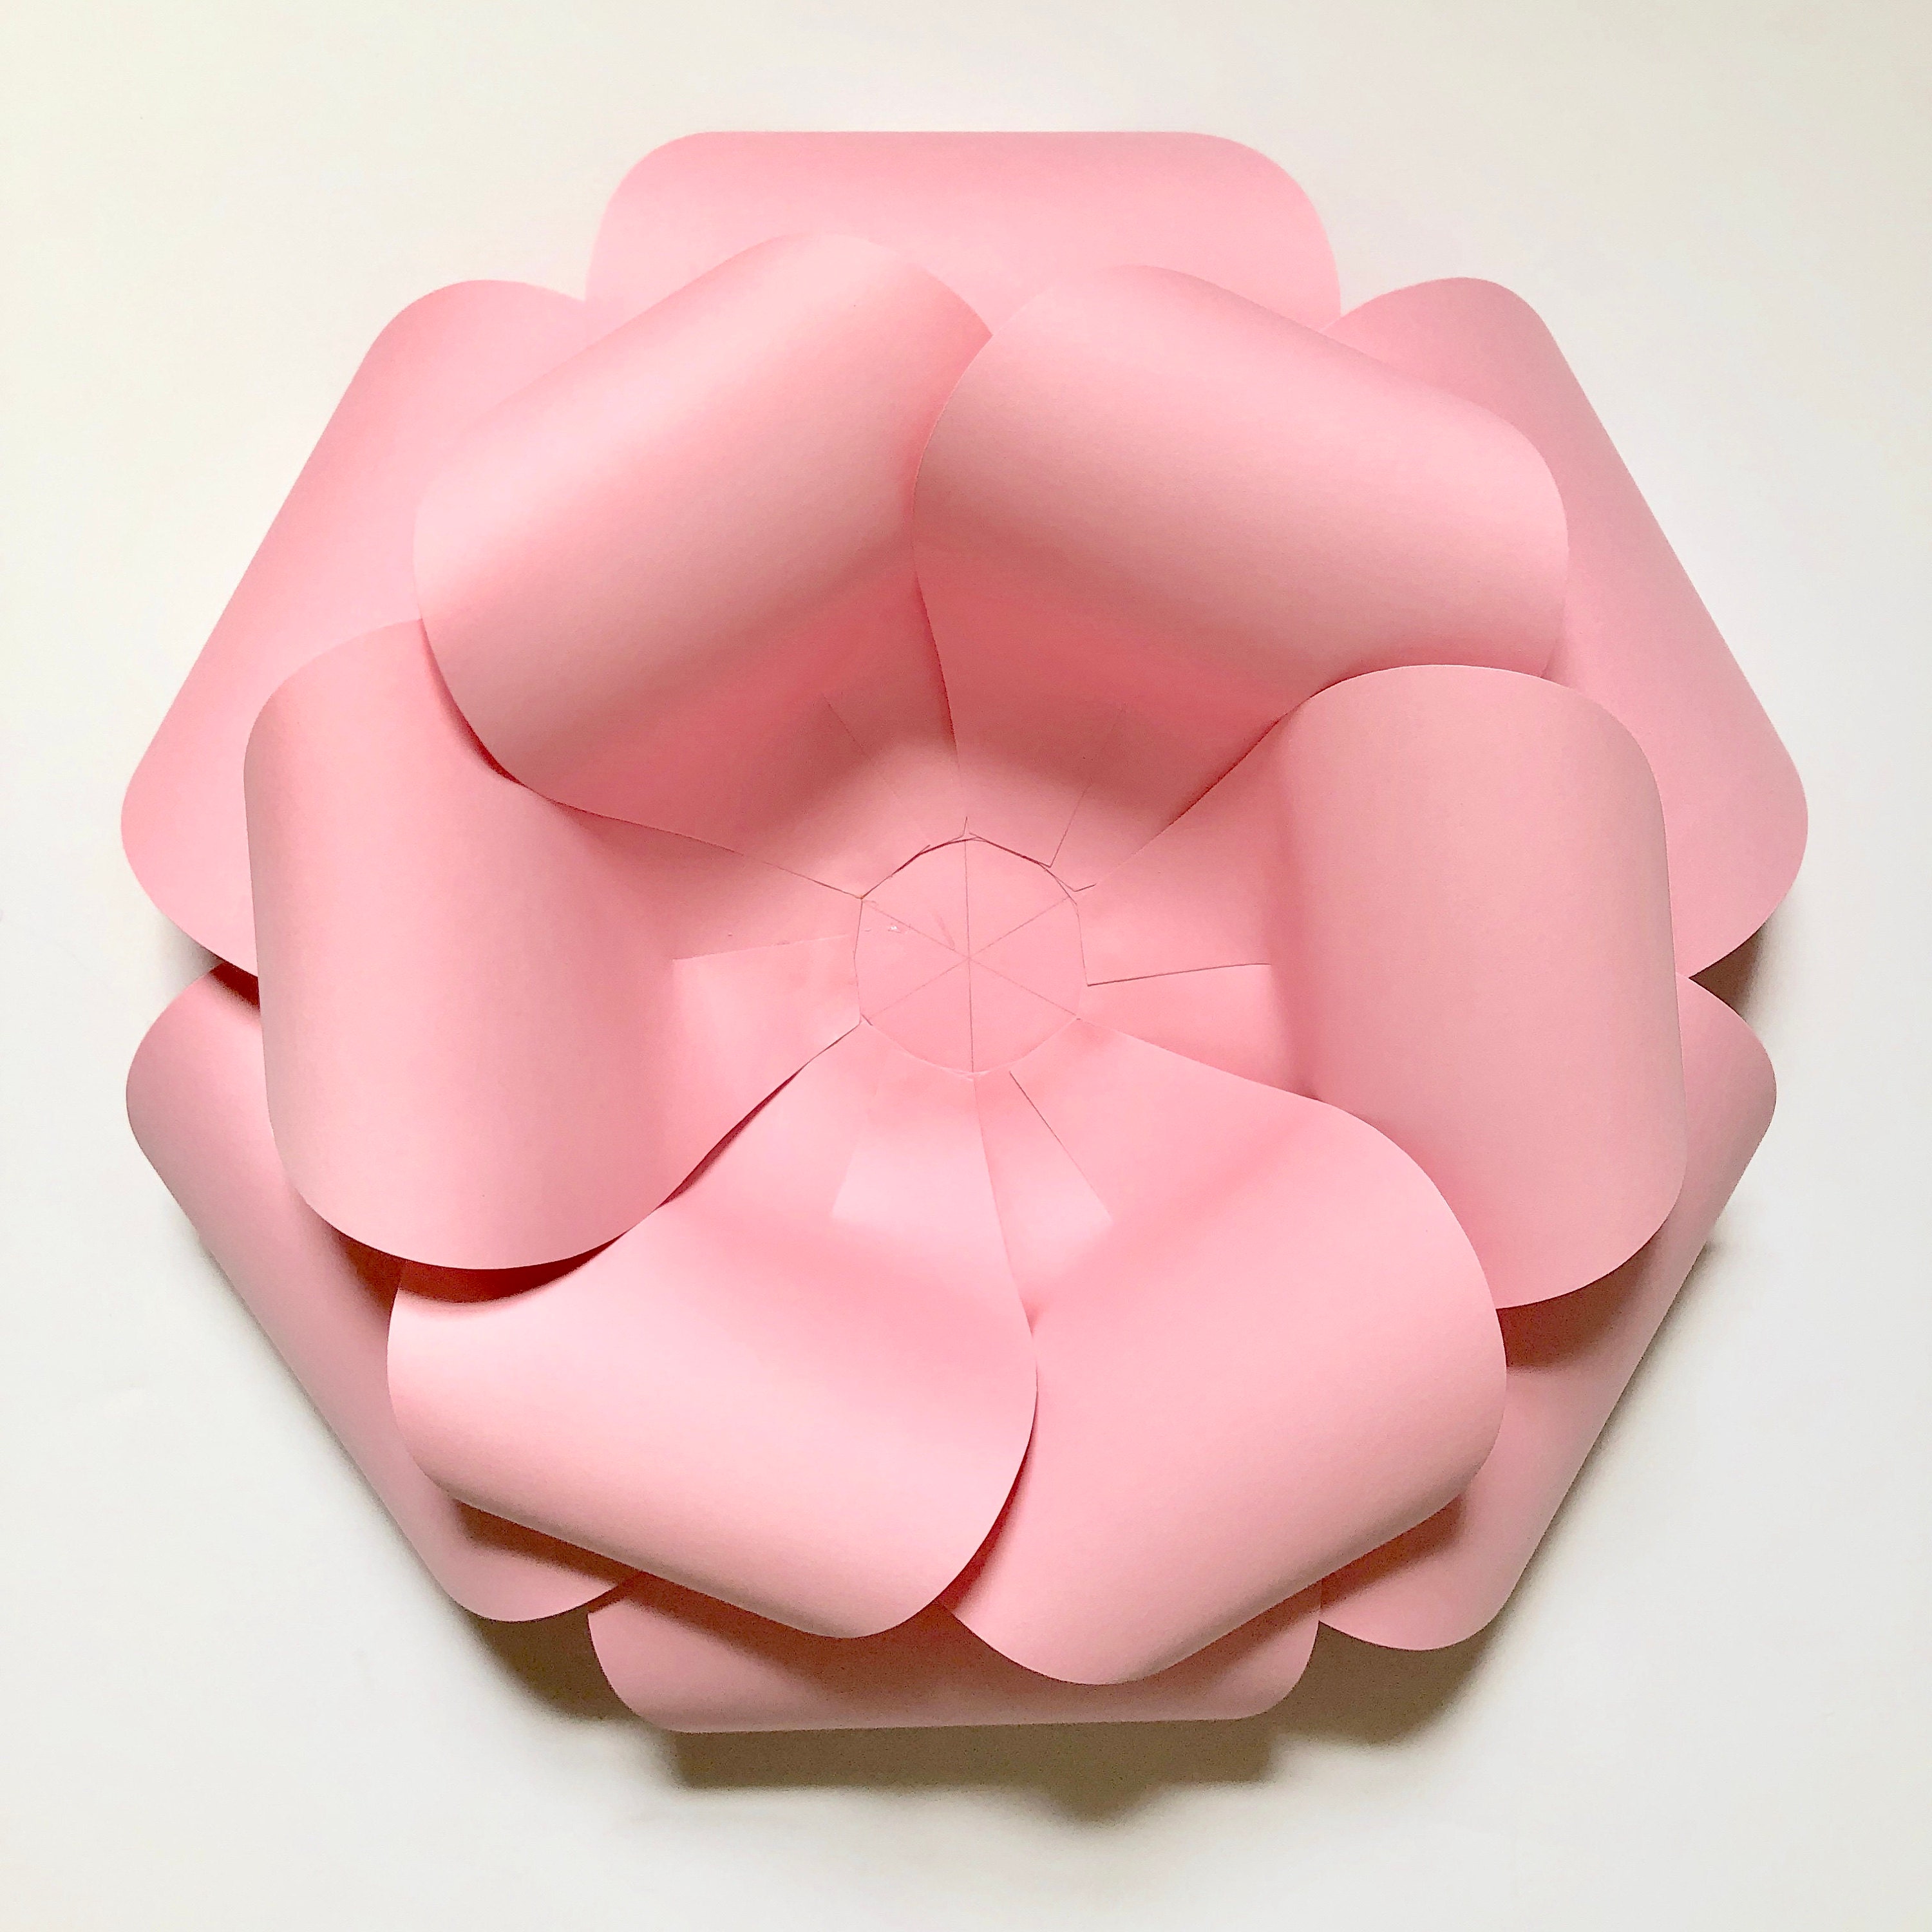
After the base is complete, the only thing that’s left is the center.

Go wild here with your imagination – it’s the accent that will change whole flower’s look! Use fluffy fringes, add pearls or rhinestones, try mixing in some crepe paper or ready-made stamens from craft stores… The possibilities are truly endless, good luck and happy crafting!
Paper Flower Guide – IvaCrafts
I like them. Just my paper doesn’t work bc wasn’t thick enough.
Yes, thin paper might crease easily and won’t hold the shape unfortunately, that’s why 67LB is the best average paper wight.
Thank you for the tutorial. What size did you make the hexagon to glue the petals to?
The hexagon is approx 4 inches from angle to angle – you can adjust the petal placement, either further away from the center or closer and it will change the size and look slightly.
for 15 inch flower how many inch base we have to take??
Approximately 4.5 inches. The base size is flexible, mark the center and move petals closer or further away to adjust the diameter. I usually draw lines on the base, from angle to angle, so that it’s easier to keep the symmetrical shape.
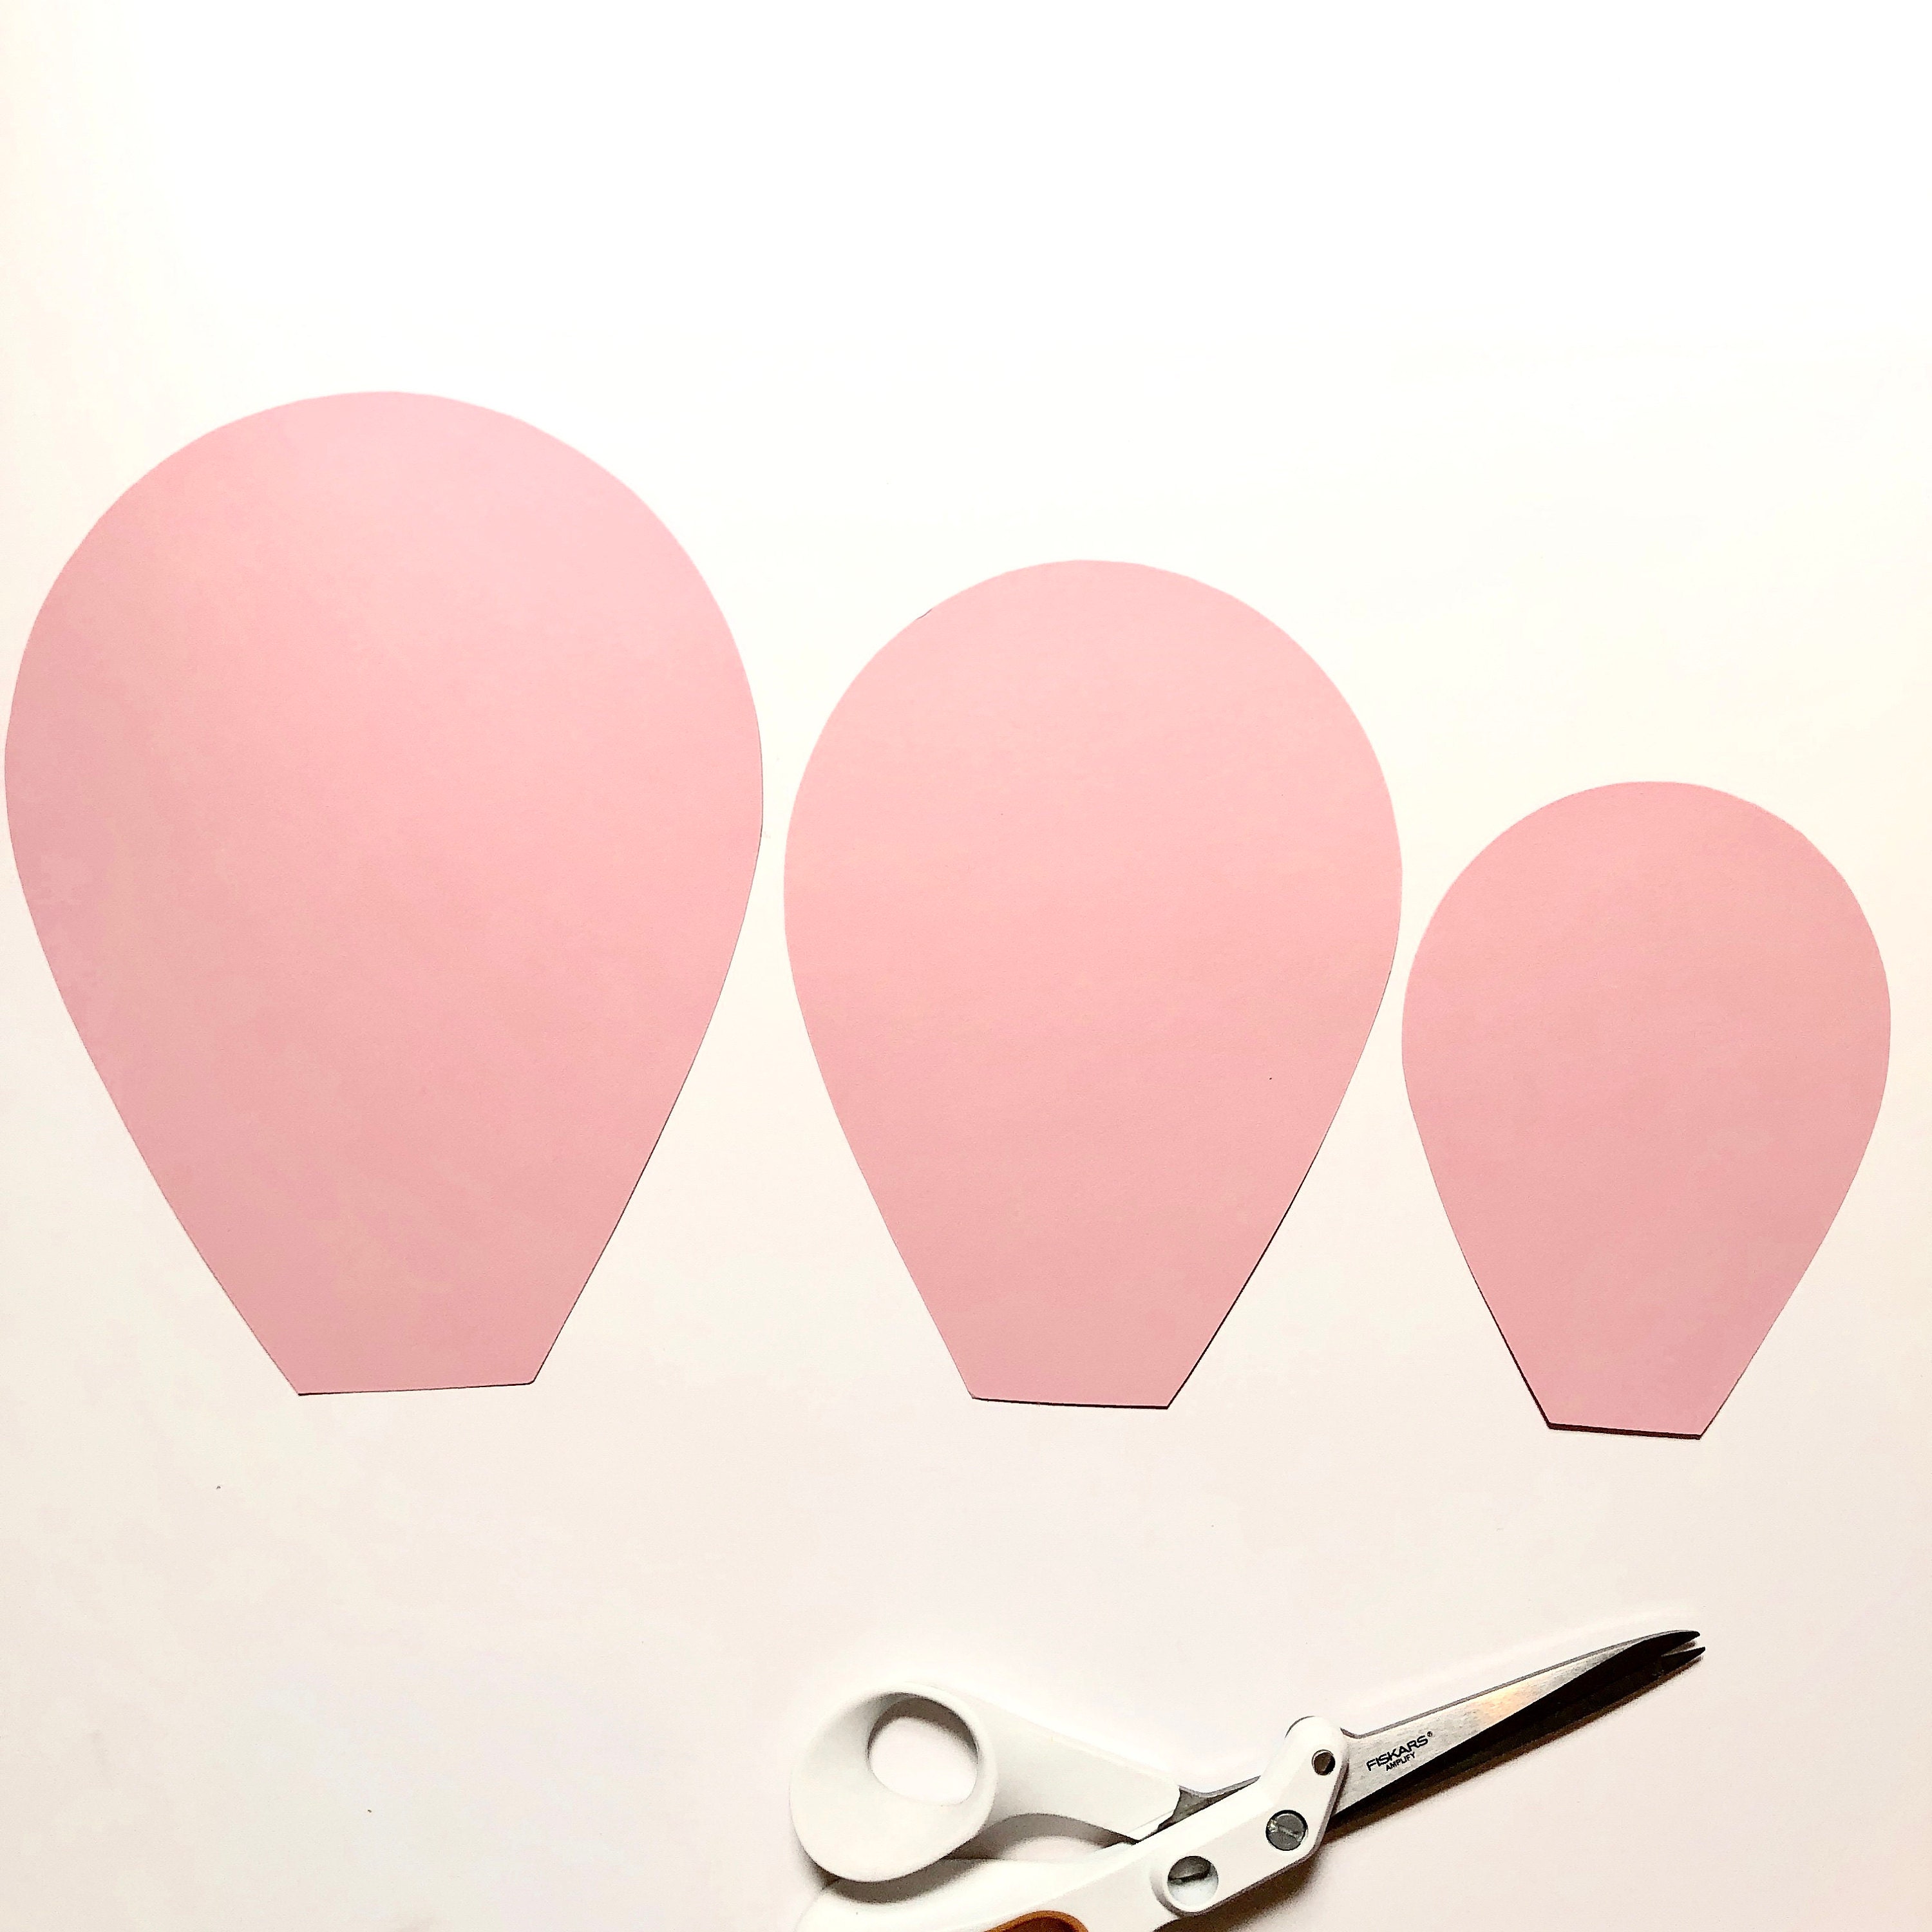
Good tutorial step by step. However, what are the sizes of the petals are not listed.
Thanks,
Zoraida Martinez
Thank you! The sizes are absolutely custom – the main rule of thumb is to make every next layer 1-1.5 inches shorter 🙂 Say, to make this flower in 15-16 inches, I take large petal 8.5″, next 7.5″ and finish with ~6″ one.
Хорошая статья
Спасибо! Thank you! Gracias!
Pingback: Paper Flower Guide | DIY Paper Crafts | Large Paper Flower Tutorial - Diydecor.Site
Great post. I was checking continuously this blog and I’m impressed! Extremely useful info particularly the last part 🙂 I care for such info a lot. I was looking for this certain information for a long time. Thank you and good luck.